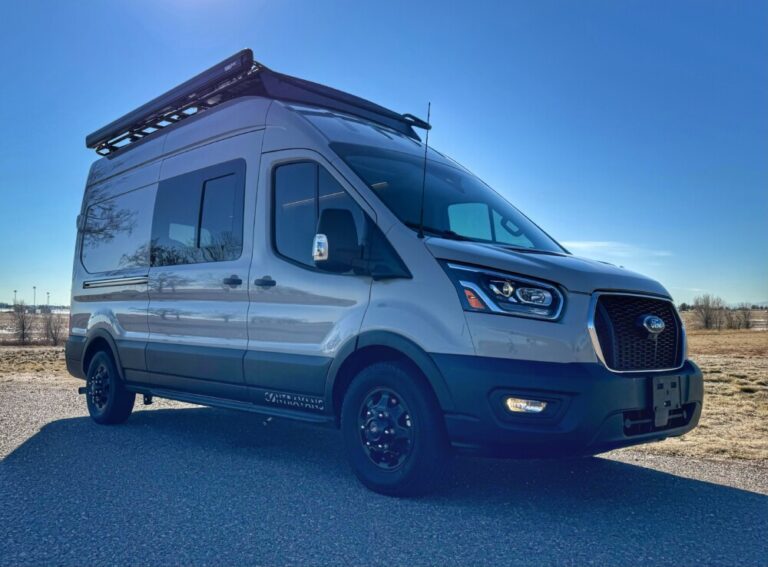
Campervan Insulation Guide: What’s the best choice and why?
ARE YOU DEBATING AMONG THE MANY CHOICES OF CAMPERVAN INSULATION MATERIALS AND TECHNIQUES?
Here’s a professional installer’s guide to deciding which insulation is best for you.
When it comes to insulating a campervan, there are a lot of truths, myths, exaggerations, and opinions on the internet to say the least. How are you to decide what is true and what is not? Take it from us, campervan conversion experts who have tested every option.
Follow below as we navigate the most popular options.
Is it worth insulating a campervan?
Absolutely! Proper campervan insulation is crucial for a comfortable and energy-efficient van life experience. Not only does it keep the interior temperature stable, but it also reduces noise and prevents condensation, which can lead to mold and rust. Whether you’re braving chilly mountain nights or the scorching desert sun, the best campervan insulation makes all the difference. Let’s check out the different options
Campervan Insulation Comparison Chart
The 5 best campervan insulation materials for you to consider are:
- Havelock Wool
- 3M Thinsulate
- Spray Foam
- Foam Board
- The Pink Stuff (Fiberglass Insulation)
Here is a detailed comparison chart of all of the best campervan insulation materials to help you make an informed decision. I will go into more detail with each one below.
| Havelock Wool | 3M Thinsulate | Flame Resistant Spray Foam | Foam Board | The Pink Stuff | |
| Price | 💲💲💲 | 💲💲 | 💲💲💲💲💲 | 💲💲 | 💲 |
| R-Value (per inch) | 🔥🔥🔥 | 🔥🔥 | 🔥🔥🔥🔥 | 🔥🔥🔥 | 🔥🔥 |
| Moisture Control | 💦💦💦💦 | 💦💦💦💦 | 💦💦💦💦 | 💦💦💦💦 | 💦 |
| Installation Difficulty | 🪛🪛 | 🪛🪛 | 🪛🪛🪛🪛🪛 | 🪛🪛🪛🪛 | 🪛🪛 |
| Sustainability | 🌎🌎🌎🌎🌎 | 🌎🌎🌎 | 🌎 | 🌎 | 🌎 |
| Allergen Resistance* | 🤧🤧🤧🤧🤧 | 🤧🤧🤧🤧🤧 | 🤧🤧 | 🤧🤧 | 🤧 |
| Flame Resistance | 🧯🧯🧯🧯🧯 | 🧯🧯🧯 | 🧯🧯🧯 | 🧯 | 🧯🧯🧯 |
What is R-Value?
R-Value is a crucial metric in the world of campervan insulation. It represents the material’s ability to resist heat flow. The higher the R-Value, the better the insulation performance. This means a higher R-Value material will keep your campervan cooler in summer and warmer in winter, leading to a more comfortable and energy-efficient living space.
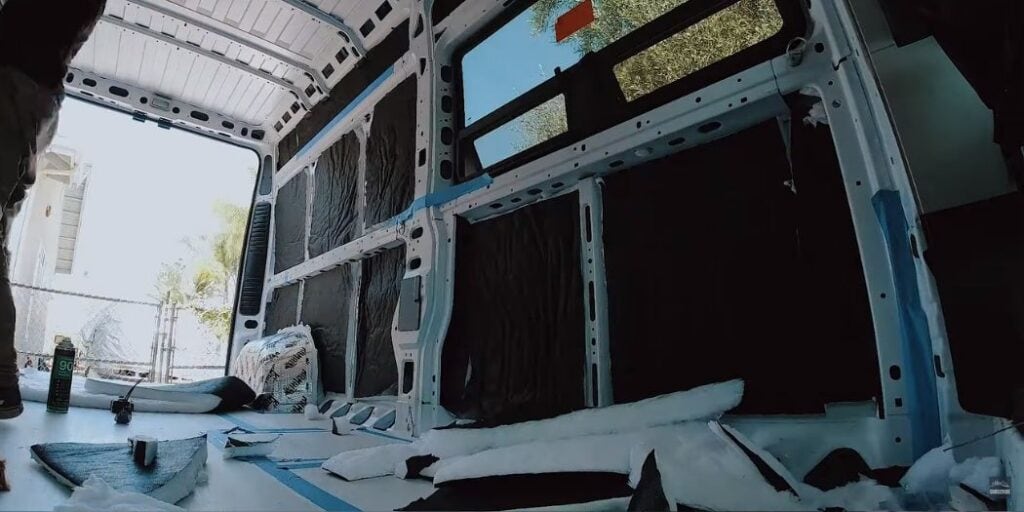
Explore The Different Types Of Campervan Insulation
Havelock Wool
Cost to Insulate a Van with Havelock Wool
Havelock Wool is an eco-friendly campervan insulation option made from sheep’s wool. It tends to be a little more expensive than some synthetic insulations. For a campervan van, the cost of Havelock Wool insulation might range from $500 to $1,000, depending upon the size of your van and how much insulation you use.
Pros and Cons
Pros:
- Eco-friendly: Made from 100% natural sheep’s wool.
- Excellent moisture control: Absorbs and releases moisture without compromising thermal efficiency.
- Soundproofing qualities: Reduces noise for a peaceful environment.
- Non-toxic and safe to handle.
- Easy to install and can be cut to tuck into all the nooks and crannies of your van
Cons:
- Higher cost: More expensive than synthetic options.
- Moderate R-Value: Less insulative compared to some synthetic materials.
- Poor insulation option for the floor.
How to Install Havelock Wool

- Measure & Cut: Measure the space between the framing of your van and cut the wool to size.
- Placement: Tuck the wool into cavities between the van’s framing. Ensure it’s snug but not overly compressed.
- Secure in Place: Use a mesh or adhesive to hold the wool in place. This prevents it from shifting during travel.
3M Thinsulate
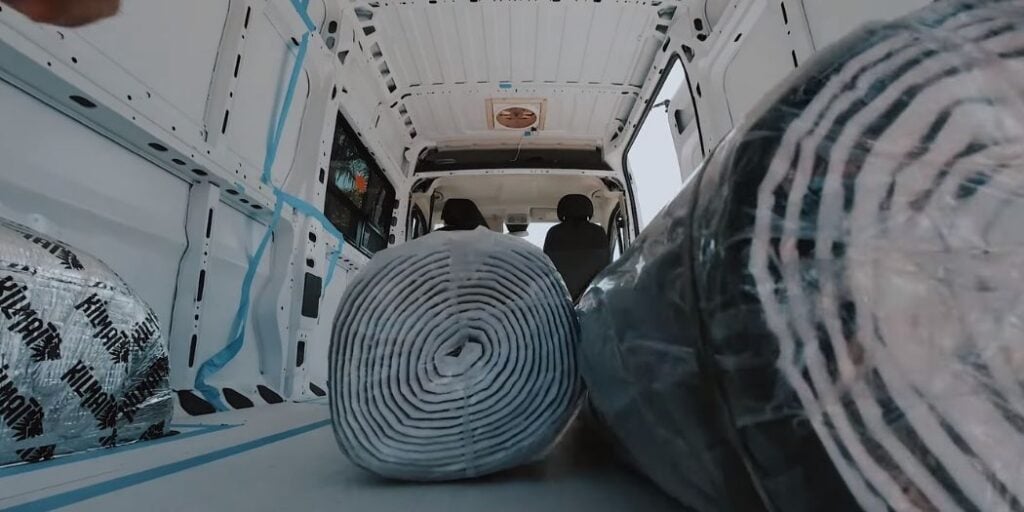
Cost to Insulate a Van with 3M Thinsulate
3M Thinsulate is a synthetic campervan insulation material known for its effectiveness in dampening noise and retaining heat. The cost for insulating a medium-sized van with 3M Thinsulate might range from $500 to $750, depending upon the size of your van and how much insulation you use. If doubling up the Thinsulate for better R-value, the cost will obviously double.
Pros and Cons
Pros:
- Easy to install: Flexible and easy to cut to size.
- Thin and lightweight: Does not take up much space.
- Low allergenic: Safe for most people to handle.
Cons:
- Lower R-Value: Excellent as a sound barrier, but lower R-value per inch than other options.
- Installation in nooks and crannies is more difficult that with Havelock wool.
- Cost: More expensive than traditional insulation materials.
- Moderate moisture control.
- Poor insulation option for the floor.
How to Install 3M Thinsulate
- Cut to Size: Measure your van’s walls, ceiling, and floor, then cut the Thinsulate to fit these dimensions.
- Apply Adhesive: Use a spray adhesive on both the van surface and the Thinsulate.
- Press into Place: Press the Thinsulate onto the surface, ensuring full adhesion to the glue.
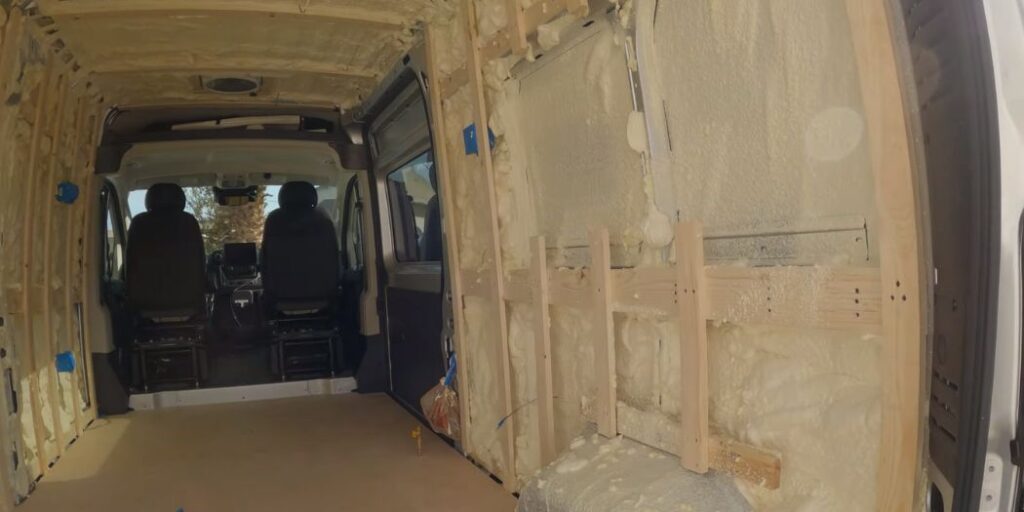
Spray Foam
Cost to Insulate a Van with Spray Foam
Spray foam insulation offers excellent coverage in campervans and insulation properties but tends to be one of the more expensive options. For a medium-sized van, the cost of spray foam insulation could range from $1000 to $2000 or more, depending on the thickness and coverage desired. The cost will also vary whether you install it yourself or get a professional to do it. Due to potential issues with installation, we always recommend having it professionally installed.
Pros and Cons
Pros:
- Very high R-Value: Excellent thermal insulation.
- Great moisture barrier: Prevents condensation effectively.
- Air sealing: Fills gaps and crevices completely.
- Good insulation option for the floor.
Cons:
- Messy, time-consuming, and challenging installation: Requires precision and can be difficult to DIY.
- Chemicals: Contains chemicals that may be harmful during application.
- Permanent: Difficult to remove or modify once applied.
- Not very environmentally friendly.
How to Install Spray Foam
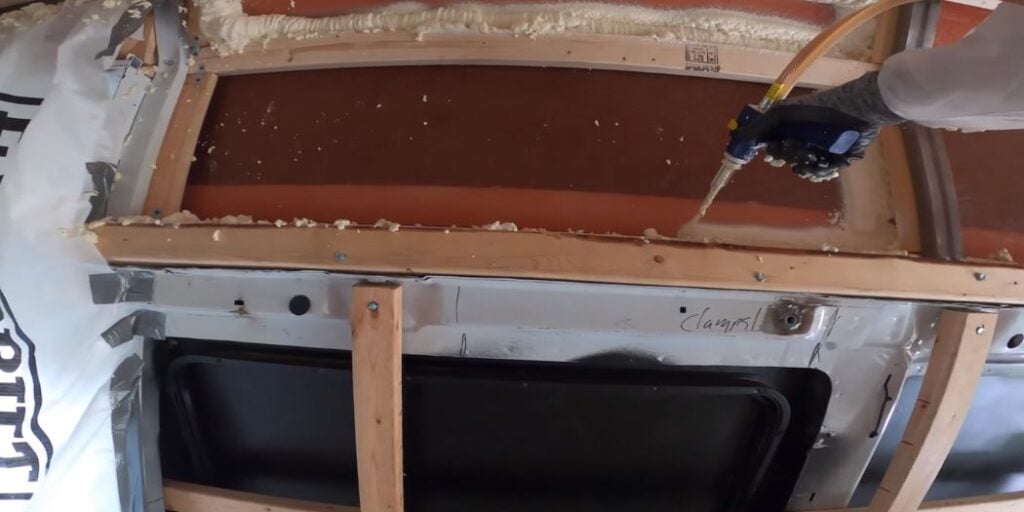
- Surface Preparation: Clean and dry all surfaces thoroughly.
- Spraying: Use a spray foam kit to apply the foam evenly across surfaces. It’s recommended to wear protective gear and ensure good ventilation.
- Trimming: Once cured, trim any excess foam for a neat finish.
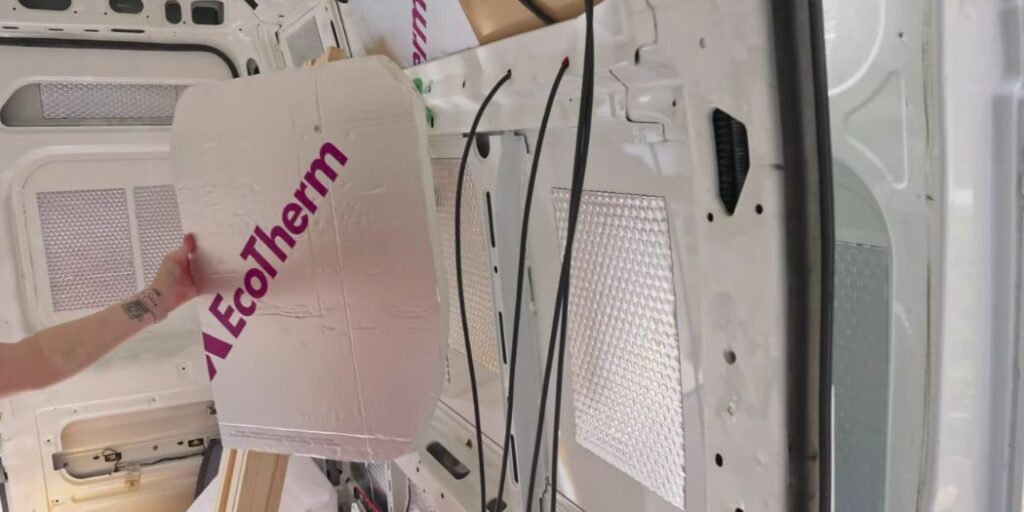
Foam Board
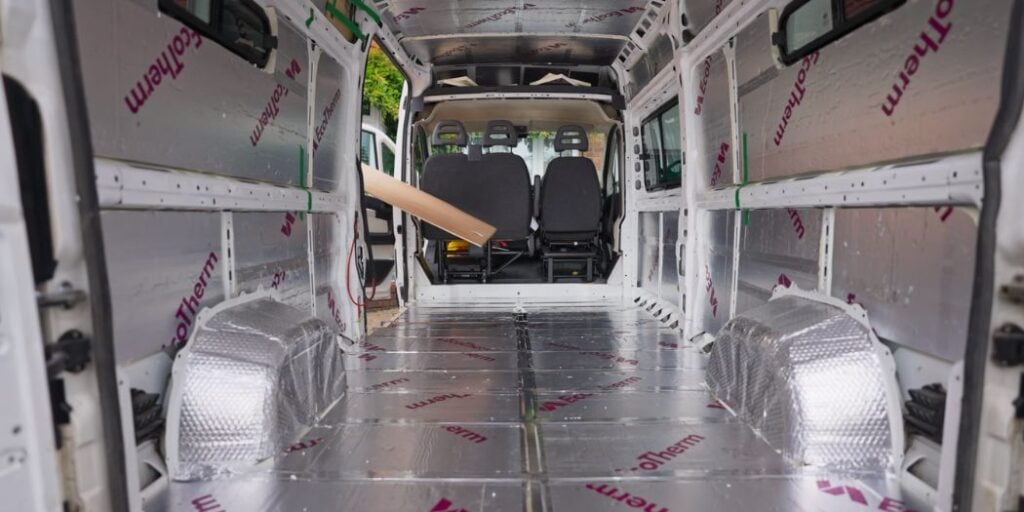
Cost to Insulate a Van with Foam Board
Foam board campervan insulation, such as rigid foam insulation panels, is a more affordable option compared to spray foam. For a medium-sized van, the cost of foam board insulation might range from $200 to $600.
Pros and Cons
Pros:
- Affordable: One of the most cost-effective options.
- High R-Value: Good thermal resistance.
- Easy to install in large spaces: Rigid panels are easy to cut and fit in the large panel areas of your van.
- Very good insulation option for the floor.
Cons:
- Difficult and time-consuming to install in small spaces: It’s difficult or impossible to install rigid foam board in small, irregularly shaped areas. It’s impossible to install in the nooks and crannies of the van’s framing around doors, in doors, etc. For those areas, we recommend using Havelock wool or 3M Thinsulate.
- Requires sealing: Gaps between boards need to be sealed for effective insulation.
- Lower moisture control: Not as effective in damp conditions if not installed correctly. The foam will not be an issue with moisture, but it could collect behind the insulation.
How to Install Foam Board
- Measure & Cut: Measure the area and cut the foam board to fit snugly.
- Fit into Place: Place the foam board against the van walls, ceiling, and floor.
- Seal Joints: Use insulation tape or foam spray to seal the joints between boards.
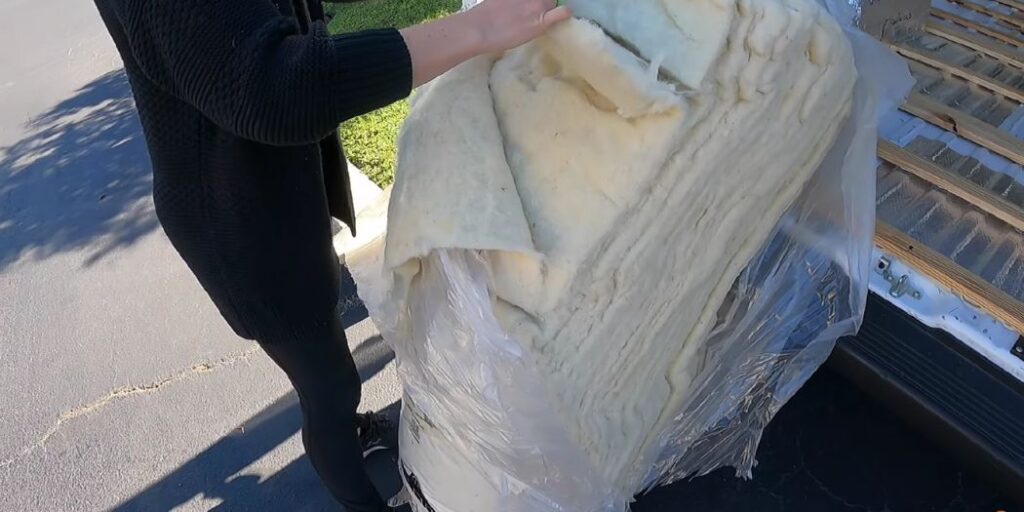
The Pink Stuff (Fiberglass Insulation)
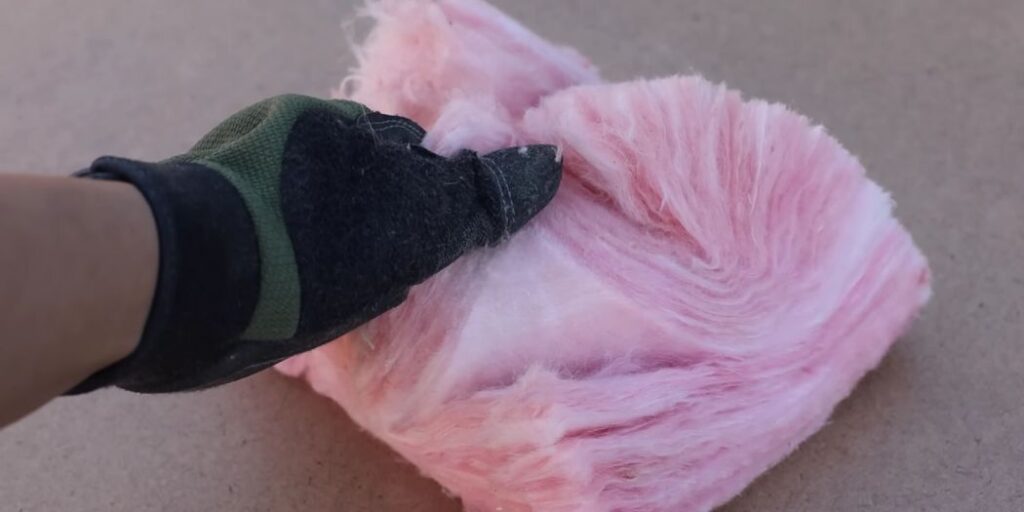
Cost to Insulate a Van with The Pink Stuff
Fiberglass campervan insulation, often referred to colloquially as “The Pink Stuff,” is a commonly used insulation material due to its affordability. For a medium-sized van, the cost of fiberglass insulation might range from $200 to $500.
Pros and Cons
Pros:
- Inexpensive: One of the cheapest options available.
- Easy to handle and install: Can be cut to fit any space.
- Good R-Value: Offers good thermal insulation.
Cons:
- Poor moisture control: Can absorb moisture, leading to mold. IF you use the pink stuff DO NOT use the type with paper backing as that is guaranteed to hold moisture.
- Can be irritating: Fiberglass particles can irritate skin and lungs during installation and/or after installation if not fully encapsulated in the walls.
- Lower fire resistance: Not as fire-resistant as other options.
How to Install The Pink Stuff
- Preparation: Wear protective clothing, gloves, and a mask to avoid irritation.
- Cut to Size: Measure the space and cut the insulation to fit.
- Place in Walls: Fit the insulation between the framing, ensuring it’s snug but not compressed.
DIY vs Professional Campervan Insulation
Professional Campervan Insulation
Opting for professional campervan insulation services offers numerous benefits. Professionals possess the expertise and tools to ensure a thorough job, making use of high-quality materials and techniques. They can also provide valuable advice on the best insulation type for your specific needs and climate. This option is ideal for those who prefer a hassle-free process and are willing to invest more for guaranteed results. Professional installation often comes with warranties and ensures that the insulation is applied correctly, efficiently, and safely, adhering to the highest standards.
Pros:
- Expertise and Quality: Professionals have the skills, experience, and tools to ensure high-quality installation. They know how to handle various materials correctly and efficiently.
- Time-Saving: Hiring a professional saves you the time and effort of doing it yourself.
- Guaranteed Results: Professionals often offer guarantees or warranties for their work, giving you peace of mind.
- Compliance and Safety: Professionals are aware of the latest regulations and safety standards, ensuring that the installation complies with all requirements.
Cons:
- Cost: Professional installation can be significantly more expensive than DIY.
- Less Customization: You might have limited options in terms of materials and methods used, depending on the service provider.
- Scheduling: You need to work around the availability of the professionals, which might not always align with your timeline.
For a free quote or any questions about your campervan insulation, feel free to reach out to Contravans here.
DIY Campervan Insulation
For the hands-on campervan enthusiast, DIY insulation can be a rewarding project. It allows for complete customization and can be more cost-effective. However, it requires a good understanding of insulation materials and techniques, as well as a fair amount of time and effort.
Pros:
- Cost-Effective: Doing it yourself can save money on labor costs. You only pay for materials.
- Complete Control: You have full control over the materials and methods used.
- Learning Experience: DIY projects can be very rewarding. You gain skills and knowledge that are valuable for future van maintenance or modifications.
- Flexibility: Work on your own schedule and at your own pace.
Cons:
- Time-Consuming: It can be a time-intensive process, especially if you are learning as you go.
- Quality Risks: Without professional experience, there’s a risk of less efficient installation, which can affect the van’s comfort and energy use.
- Physical Effort: Insulation installation can be physically demanding and requires a certain level of fitness and stamina.
- Safety Risks: Without proper knowledge and precautions, there’s a risk of injury or health hazards, especially when handling certain insulation materials.
DIY Installation Tips
Campervan Insulation to Avoid
When insulating your campervan, it’s just as important to know what materials to avoid as it is to know what materials to use. Some types of insulation might seem like a good idea at first, but they can lead to problems down the road. Here are some types of campervan insulation that are generally best avoided:
- Fiberglass Insulation: While it’s commonly used in homes, fiberglass insulation is not ideal for campervans. It can retain moisture, leading to mold growth and rust. Moreover, the fibers can be irritating to the skin and lungs, which is a significant concern in the confined space of a van.
- Reflectix and Similar Foil-Faced Bubble Wrap Products: These materials are often marketed as insulation, but they actually work more as radiant barriers. They’re not effective as primary insulation in a campervan because they have a very low R-Value. They’re best used in conjunction with other insulation types or where there is an air gap, not as a standalone solution.
- Recycled Denim or Cotton: While eco-friendly, these materials can absorb moisture, which can lead to mold and mildew problems in the confined space of a campervan. Additionally, they don’t offer the best thermal insulation compared to other materials available.
- Polystyrene Foam Panels (Styrofoam): These are less durable and can break down over time, especially in a moving vehicle. They also have poor fire resistance and release toxic fumes when burned.
- Spray Insulation with Harmful Chemicals: Some spray foams can emit harmful gases during and after application, which can be a health concern in the limited ventilation environment of a campervan.
- Cheap, Non-Automotive Insulation Products: These products might not be designed for the unique challenges of a moving vehicle, such as vibration, temperature extremes, and moisture control.
What Should I Consider Before Choosing The Right Campervan Insulation?
Picking the right insulation for your campervan is a big deal. It’s like choosing the perfect jacket for a long trip. You want something that keeps you comfy, fits well, and lasts a long time. Here’s a simpler breakdown of what to think about:
- Keeping Dry: Some insulations don’t like getting wet. If you’re heading to damp places, choose something that won’t soak up moisture like a sponge.
- Warmth Factor (R-Value): This is like the warmth rating of a sleeping bag. Higher numbers mean more warmth. Think about how much you need based on your travel plans.
- Easy to Put Up: If you’re doing it yourself, some insulation is like a puzzle, and some is more like a simple Lego set. Choose what you can handle.
- Space and Weight: Thick insulation eats up your living space and makes your van heavier (hello, gas bills!). Find something that’s just right – effective but not too bulky.
- Eco-Friendly and Safe: Some insulations are greener than others and healthier for you, too. Look for stuff that’s kind to the planet and won’t make you itchy or sneezy.
- Your Wallet: Price matters. But remember, sometimes spending a bit more now can save you money in the long run with better quality.
- Toughness: Your insulation should be like a good travel buddy – reliable and tough. The material and the installation method should be able to handle all the bumps and shakes of the road.
- Quiet Please: Some materials can help muffle outside noises. If peace and quiet are important to you, keep this in mind.
- Fixing and Upkeep: Accidents happen. If something goes wrong, can you fix it easily? Some materials are more high-maintenance than others.
The Best Campervan Insulation Strategy From A Professional
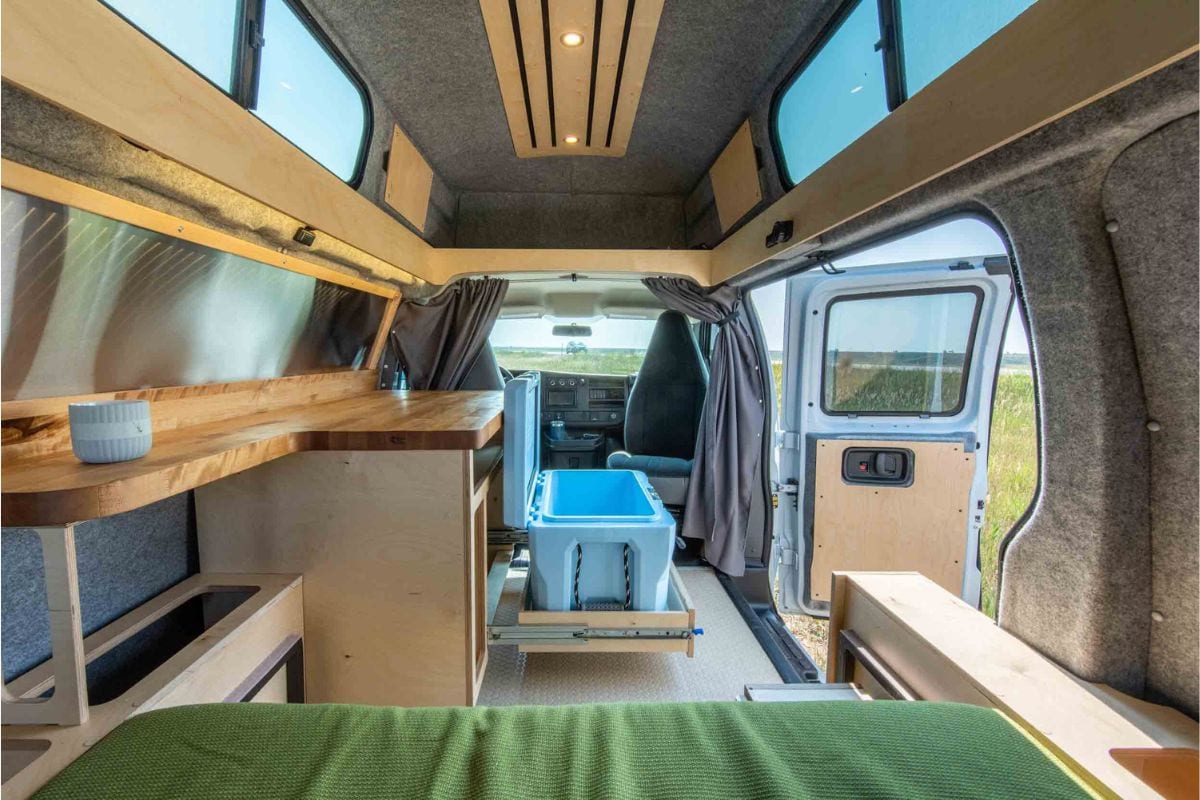
As a seasoned professional in campervan conversions, I’ve learned that effective campervan insulation is key to creating a comfortable, energy-efficient van life experience. Here’s my insider take on how to best insulate the three critical areas of your campervan: the floor, the roof, and the walls.
Floor
- Best Material: For the floor, I swear by rigid foam boards. They strike the perfect balance between durability and insulation efficiency.
- Insider Tip: The floor is prone to a lot of wear and tear. Therefore, choosing a material like rigid foam boards, which can withstand weight and constant use without losing insulative properties, is crucial. Cut the boards to fit snugly between the van’s floor ribs and seal all seams with a high-quality tape or sealant to prevent air and moisture infiltration. Finish with a plywood layer for a robust and even floor.
- Pro Tip: Order a pre-made floor from us for the ultimate fit and ease of installation. We have 3 options available to meet your needs.
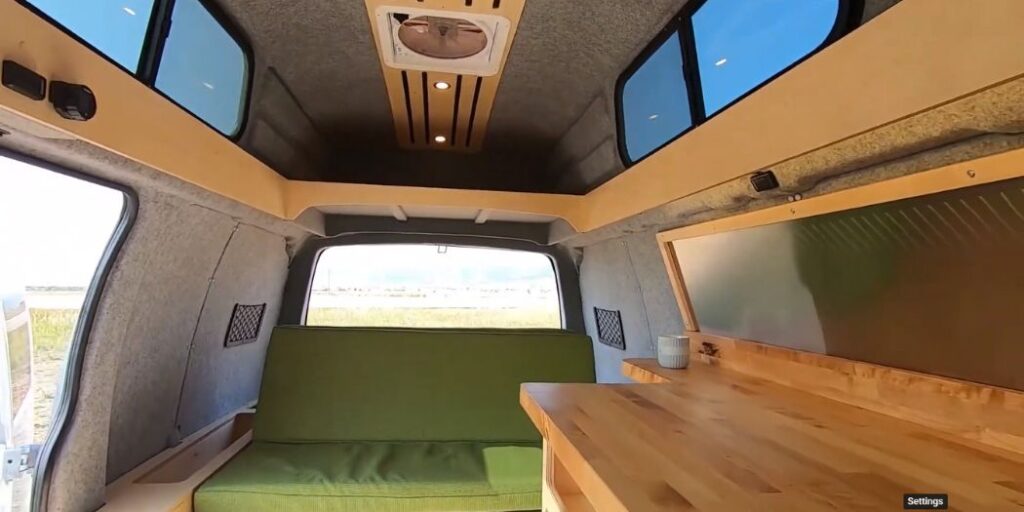
Roof
- Best Material: On the roof, we use Havelock wool. It’s easy to install and performs very well.
- Insider Tip: We work on all roof heights of vans; low, medium, and high. We are often keen on maximizing headroom. For that reason, we tuck our ceilings high against the van roof ribs and conform the panels to the shape of the van. There’s still plenty of room behind the ceiling for adequate insulation.
- Pro Tip: Remember that if most of the space of your roof is occupied with a fan, air conditioning unit, roof rack, and/or solar panels, you’ll have a protective layer above you that will help keep the solar rays out of the interior or your van.
Walls
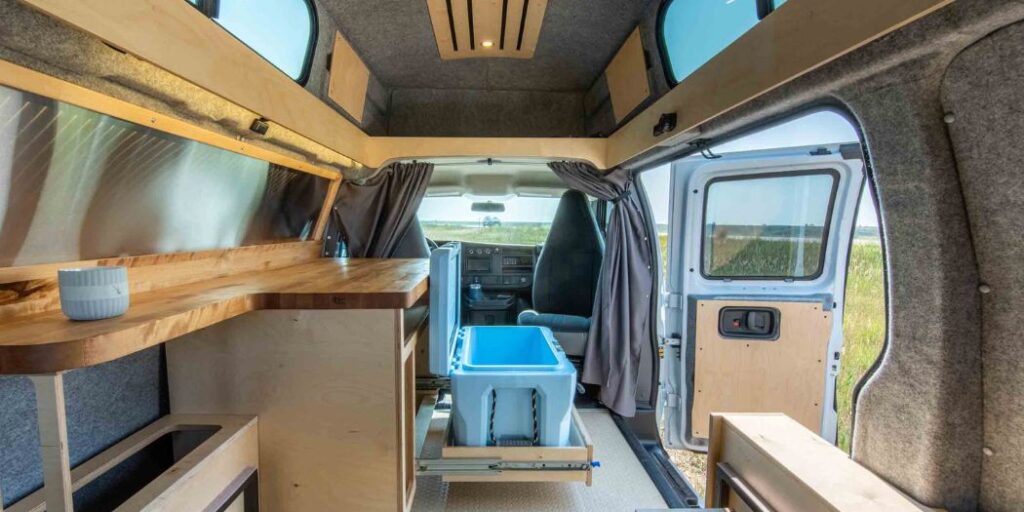
- Best Material: For the walls, we prefer using either Havelock Wool or 3M Thinsulate.
- Insider Tip: Wall insulation needs to be flexible enough to fit into various nooks and crannies, offering both thermal insulation and sound dampening. Wool is the easiest to tuck into the small cavities inside a van. Measure and cut the material to fit tightly between the wall framing, and secure it without compressing too much. Compressing it will reduce its function. Proper installation is key here; you want to avoid any thermal bridging that can occur if the insulation doesn’t fully cover the wall surfaces.
For a free quote or any questions about your campervan insulation, feel free to reach out to Contravans here.
The Best Campervan Insulation For Hot and Cold Weather
As a professional in campervan conversions, I understand that insulation needs vary greatly depending on the weather. What works best in hot climates might not be as effective in colder regions. Here’s a breakdown of the best insulation strategies for both hot and cold weather conditions:
The Best Campervan Insulation For Hot Weather
- Key Focus: Reflecting the heat away from your van is one of the most important things you can do. Once the van is hot, it will stay hot (now that it’s insulated).
- Pro Tip: Use window covers that reflect the sun away from your van, especially in that giant windshield. Keeping the heat out from the start will go a long way to keeping your van cool.
The Best Campervan Insulation For Cold Weather
- Key Focus: In cold weather, high R-value materials like rigid foam boards or thicker layers of wool insulation are ideal.
- Why It’s Effective: These materials trap heat inside the van, creating a warm and cozy environment. They have a high resistance to heat flow (high R-value), which is crucial in maintaining warmth.
- Professional Tip: Make sure to insulate every part of the van thoroughly, including the floor, walls, and roof, as heat can escape from any uninsulated area. Sealing all gaps and thermal bridges is crucial to prevent cold air from seeping in. Additionally, consider using insulated window coverings to minimize heat loss through windows, which are common weak points in insulation.
For more information about Winterizing Your Campervan, check out this blog post – Winterizing Your Campervan: A How-To Guide
Campervan Insulation Weak Points | Doors, Windows, Front Cab & Fan Cover
Insulating a campervan thoroughly means paying attention to more than just the walls, roof, and floor. There are several areas that are often overlooked but can significantly impact the overall effectiveness of your insulation. Addressing these weak points is crucial:
- Doors: The doors of your campervan can be major culprits for heat loss or gain. To tackle this, make sure that the weather stripping around your door frames is in good shape. You might also consider attaching insulated panels or thick curtains to the doors to provide additional insulation.
- Windows: Windows are another critical area where you can lose a lot of heat due to their thin construction and the glass material. Combat this by using insulated covers in the winter or reflective window covers in the summer. In colder climates, you might want to look into acrylic windows. The acrylic windows aren’t as stylish, but do offer more insulative properties than traditional glass windows.
- Front Cab: The front cab area is less insulated than the main living space. Creating a barrier between the cab and the living area with insulated curtains can also help maintain a consistent temperature in your living space.
- Fan Cover: The roof fan, while essential for ventilation, can be a source of heat loss or gain. When not in use, consider installing an insulated fan cover. These are very effective at keeping your van’s internal temperature more stable since your fan cover is only made of thin plastic.
Conclusion: The Best Campervan Insulation
Concluding, the best campervan insulation is one that balances your specific needs, budget, and the conditions you’ll be traveling in. For those in varying climates, a combination of high R-value materials like rigid foam boards for the floor, and flexible insulation like 3M Thinsulate or Havelock Wool for the walls, offers a comprehensive solution. This combination provides excellent thermal resistance, moisture control, and ease of installation.
Remember, effective insulation goes beyond just the materials used. Proper installation, addressing weak points like doors, windows, and the fan cover, and considering the unique shape and needs of your van are all crucial for creating a comfortable, efficient living space.
Investing in good insulation pays off by enhancing your van life experience and keeping you comfortable in a wider range of climates.
Happy travels in your well-insulated campervan!
For a free quote or any questions about your campervan insulation, feel free to reach out to Contravans here. Or see why you should choose Contravans.
To compliment your campervan insulation, getting The Best Campervan Heater will help you stay warm in winter!
You might also be interested in:
What is the Best Van to Convert to a Camper Van? [2024 Guide]
Professional Van Conversion Cost | 2024 price Breakdown
The Best Rooftop Air Conditioner For Van Life
Mercedes Sprinter Van Lift Kit: Complete Guide